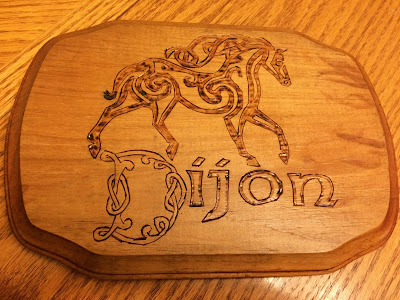
Shasta and Dijon have had stall signs for years, but I've been lazy about making another for Nilla. After years of sitting out exposed to the elements, we had to bring theirs home to scrub them and I figured Nilla should finally also have one.
It's actually a pretty easy process, but the hardest part is really deciding on the graphic for the sign. It took me a while, but I finally deciding to combine the Nilla wafer logo with a mule decal I found online. While I actually can draw, I suffer from much too much laziness for that so the internet is how this got done. It also means this project is entirely possible even if you have no artistic ability. He's how to make one:
1. Combine the horse's name and the graphic you want to use.
2. I reversed the mule graphic to fit it with the name.
3. Buy a wooden plaque from Michael's or other craft store. They cost about $2.
4. Print and cut out your graphic and make sure it fits on your plaque.
5. Place tracing paper over the image and tape the cut-out onto the tracing paper.
6. Start tracing
7. Trace the entire image
8. Flip the tracing over onto a blank white sheet of paper and trace again. You can skip this step if you remember to inverse the image before you print it (but I forgot).
9. Flip over again and tape the tracing onto the plaque. Then rub with the pencil tip (no actual lead, you just need fine-tip pressure).
10. You can see here how the pencil I laid down on the 2nd tracing is transferring onto the plaque.
11. "Trace the entire image onto the plaque and then remove the paper.
12. Get your wood burning tool. You can buy a cheap one for about $10 at a craft store. These things are not safe. Never leave them plugged in if you'e not watching them and be very careful as they will burn you.
13. Keep in mind the tool will not go around corners easily so I like to do all the vertical lines at once and then turn the tool off and let it cool down.
14. While the tool is cooling, you can sand your edges.
15. You can see below I've done mostly the vertical lines at this point. You'll want to keep moving the wood around as you do the non vertical lines. You can't really "draw" with the tool so it's more like you move the wood around beneath the pen while keeping the pen straight up and down.
16. The tool will get insanely hot and start burning your hand. I just wanted to get this done so I wrapped a washcloth around my hand. I highly advise turning it off and letting it cool. I also recommend buying a quality product instead of a $10 piece of junk if you plan on doing a lot of these.
17. Finished with the wood burning.
18. You only need a little sample jar of stain. I bought stain with polyurethane so I didn't need to do a separate clear sealant after. Don't get something too dark as you won't be able to see your image beneath a dark stain. I bought my stain from the oops section so it was only about $3.
19. Brush the stain on and wipe off the excess. If you're a pro, use real cloths. If you're just making this, use a paper towel. It's not a huge project - I wouldn't invest a lot in supplies.
20. You'll need some screw eyes. You can screw these in by hand.
21. And then you'll have a finished product. You'll just need to mount it at your barn.
Labels: Do It Yourself
